Creating GradleRIO FRC robot programs in IntelliJ is quite easy.
Step 0: The prerequisites
At this point you should already have installed Java and set up IntelliJ.
You must be connected to the internet the first time you build the project. After the first build, you can build in offline mode.
Also, you should obtain and run the WPILib one-step installer (available at the beginning of the 2019 season). Even if you’ll be developing with InteliJ, you’re likely to need the tools and project templates included in this package.
Step 1: Create a new Robot Project
There are currently several ways to create a basic WPILib robot project:
- Create a new robot project with VS Code using the WPILib extension.
- Create a project with RobotBuilder. You will need a recent version of RobotBuilder that generates GradleRIO projects. The 2019 software release will contain all new tools, including RobotBuilder. Or, you can build the latest version from GitHub.
RobotBuilder creates a full command-based project, so it may be more complicated than what is described in Step 3 below here. - Uncompress a copy of the Quickstart.zip file and make a copy of the “java” directory. Rename the directory to whatever you like.
Now, whichever method you use, add an empty directory called “vendordeps”. Your project should now look like this:
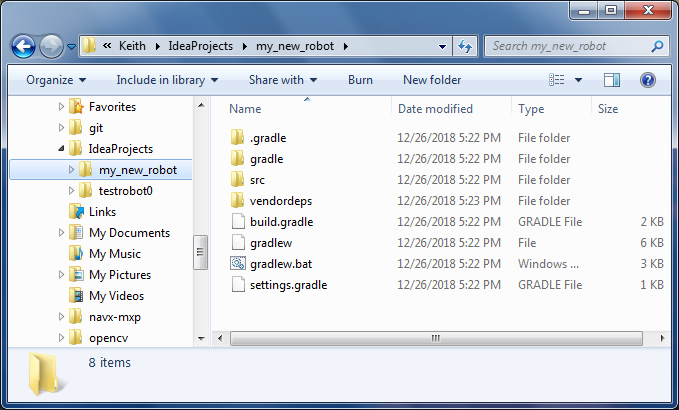
Inside IntelliJ, open the File menu and select File > Open. Select your project root directory and hit the “OK” button. The “Import Gradle” dialog will appear. Hit “OK” again and open the project in the current window. The “Gradle” tool window on the right side of the window should populate with all the GradleRIO tasks.
Third party dependencies
If you intend to use any third-party software, you will need to add some JSON files to the vendordeps directory. The best way to get these files is to get the official installers. Examples of third party packages include:
- navx_frc.json from Kauai Labs will be necessary if you use a NavX board.
- Phoenix.json from Cross the Road Electronics will be necessary if you use the Talon SRX or Victor SPX or any other CTR products
Picking a JDK
By default, your IntelliJ project will use your JAVA_HOME environment variable to determine where Java is stored on your laptop.
However, it is possible to have multiple Java Development Kits (JDKs) installed on your laptop. If you need pick a specific JDK (which IntelliJ will refer to as an SDK), you should select File > Project Structure > Project from the main menu. From the Project Structure dialog you can configure a new SDK or configure a previously defined SDK.
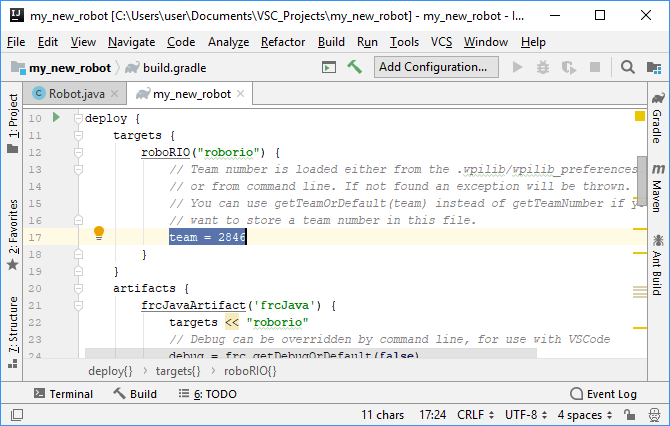
Set your team number
Open the build.gradle file and modify the team number setting, probably around 17:
First Build
Open the Gradle tools window. You should see your new project listed. Open your project’s icon and select the “build” folder and then double-click on the “build” task. This should successfully build your new FRC Java project.
Step 3: Program to control one motor
If you started your program in RobotBuilder, you may already have mostly complete program. If you started with the Quickstart example, your program is mostly just in one Robot.java file. We can augment the Quickstart example to control a motor.
Back in the Project tools window, double-click on that Robot.java file. This is your main Java program for controlling the robot.
All of the code in Robot.java is useful, but for simple programs it is optional. To keep this tutorial really simple, we’re going to delete everything except robotInit() and teleopPeriodic(). Also we’re going to tweak the “import” statements a bit:
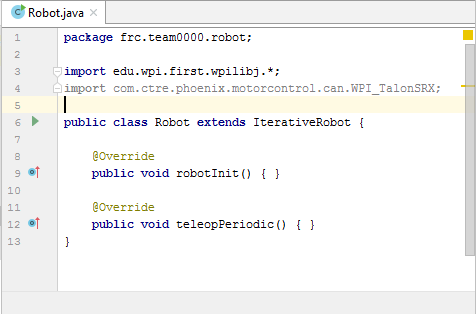
For this example, assume we have a joystick connected to drivers’ station and a motor controller connect to the roboRIO. We’ll create two variables around line 7 to represent them:
Joystick stick;
SpeedController motor;
Now we’ll instantiate the objects inside the robotInit() method:
public void robotInit() {
    stick = new Joystick(0);
    motor = new WPI_TalonSRX(2);
}
For my example, I’m using a Talon SRX connected to CAN ID 2. If you’re using any other motor controller, just change the line to reflect your hardware.
Next, change your teleop mode so it reads the joystick, and sets the speed of the motor:
public void teleopPeriodic() {
    double speed=stick.getY();
    motor.set(speed);
}
The getY() function tells us how for forward or backwards the joystick has been pushed. The speed value will be a number between -1.0 and 1.0.
From the Gradle tools window you can now build or deploy the program.
Step 4: Drive your robot
Start up the FRC Driver Station software. You should see green bars next to “Communications”, “Robot Code”, and “Joysticks”. Also, you should see your correct team number. If the team number is wrong, click the Gear icon on the left side to get to the setup panel.

Click the “Enable” button to initialize teleoperated mode. You should now be able to drive the motor with the joystick.
Consider for a moment what’s going on with the code. The robotInit() method was called once, and then teleopPeriodic() is being called 50 times a second. Each call of teleopPeriodic() reads the joystick and passes that value into the motor.
Further Reading:
- FRC Java Programming, at Screen Steps Live
